TEST IT YOURSELF!
Security meets simplicity and functionality with our cloud solution - now on a German cloud! Test our affordable cloud solution for yourself now and find out more about it.
Connecting the Milestone XProtect Smart Client to our cloud solution allows you to access our demo server from anywhere as long as you have an internet connection. Here you will find a simple step-by-step guide to make this process as smooth as possible.
Step 1: Preparation
- Before you start, make sure you have the latest XProtect Smart Client 64 Bit and have installed the hotfix on your computer. Contact us if you do not yet have an account with Milestone and to receive the login information (username and password) for the Argus Demo Server: support(at)argus.eu
If you are not familiar with the Smart Client user interface, we strongly recommend that you take the Milestone's Smart Client course to complete it.
- Milestone also offers under this Link many useful training courses for those who want to familiarize themselves with the world of Xprotect.
Here you will find useful documents on how to operate the XProtect Smart Client:
Install the necessary Milestone and third-party plugins for the Smart Client (click on the plugin name):
Step 2: Open Milestone XProtect Smart Client
Start the Milestone XProtect Smart Client on your computer.
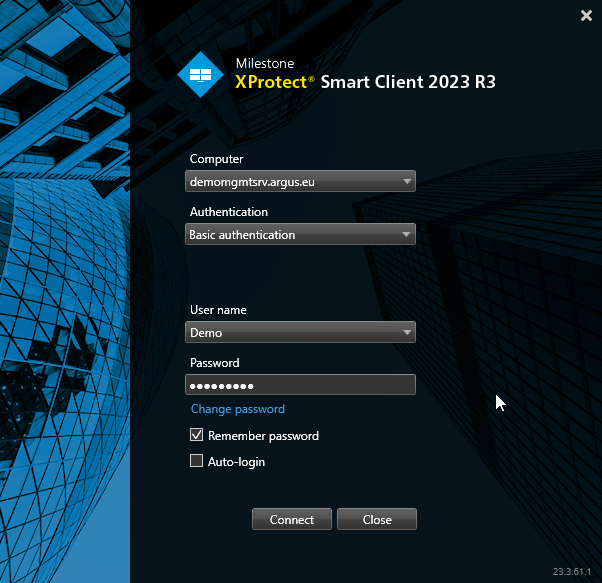
Step 3: Enter login information
Enter the following domain name of our cloud server under Computer: demomgmtsrv.argus.eu
Under Authentication, select Basic Authentication. Enter the user name and password that you received from us.
Click Connect to establish the connection to the cloud server.
Help and support
Should you encounter any problems during setup or use, our customer support team is ready to help you. Do not hesitate to contact us: support(at)argus.eu
Additional tips:
- Make sure your Internet connection is stable to ensure an uninterrupted connection.
- Regular updates of the Milestone XProtect Smart Client ensure optimal performance and security.
- Take advantage of Milestone training resources and documentation to unlock the full potential of our cloud solution.
Operation and features
Note: To be able to use all functions of the Smart Client, install the plugins in step 1.
Milestone features:
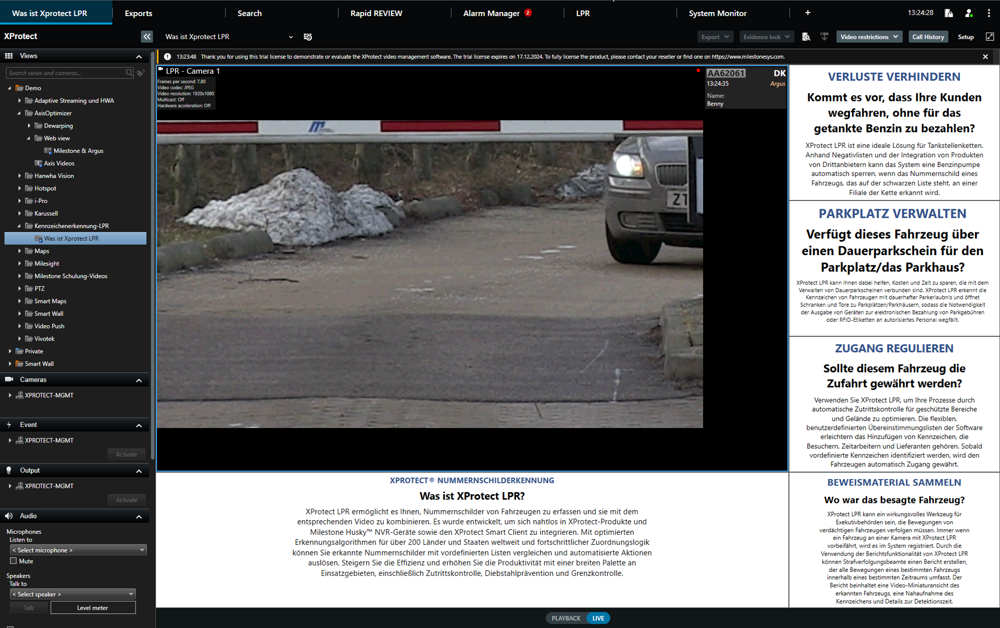
LPR server (license plate recognition)
XProtect LPR allows you to capture license plates from vehicles and combine them with the corresponding video. It is designed to integrate seamlessly with XProtect products and Milestone Husky™ NVR devices as well as the XProtect Smart Client. With optimized detection algorithms for over 200 countries and states worldwide and advanced mapping logic, you can compare detected license plates with predefined lists and trigger automated actions. Boost efficiency and increase productivity with a wide range of applications, including access control, theft prevention and border control.
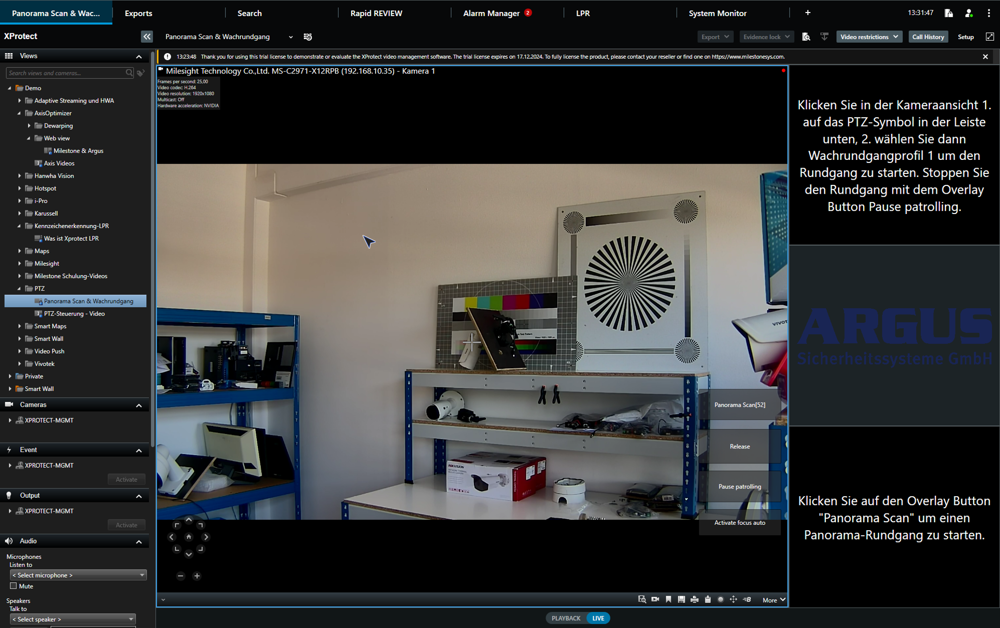
PTZ control
Pan-tilt-zoom (PTZ) control is an essential feature within the Milestone XProtect video management system that allows users to adjust the orientation and zoom of their surveillance cameras in real time. This feature provides flexible surveillance by enabling users to view specific areas in more detail or get a broader overview of a particular area. The integration of PTZ control in Milestone XProtect allows users to control the camera both manually and through predefined settings (such as patrols, panoramic scan or guard tours), enabling efficient monitoring of large or complex areas with minimal manpower. XProtect's user interface is intuitively designed so that even people without in-depth technical knowledge can easily use the PTZ functions. In addition, Milestone XProtect supports a wide range of camera models and manufacturers, ensuring high compatibility and flexibility in existing surveillance systems.
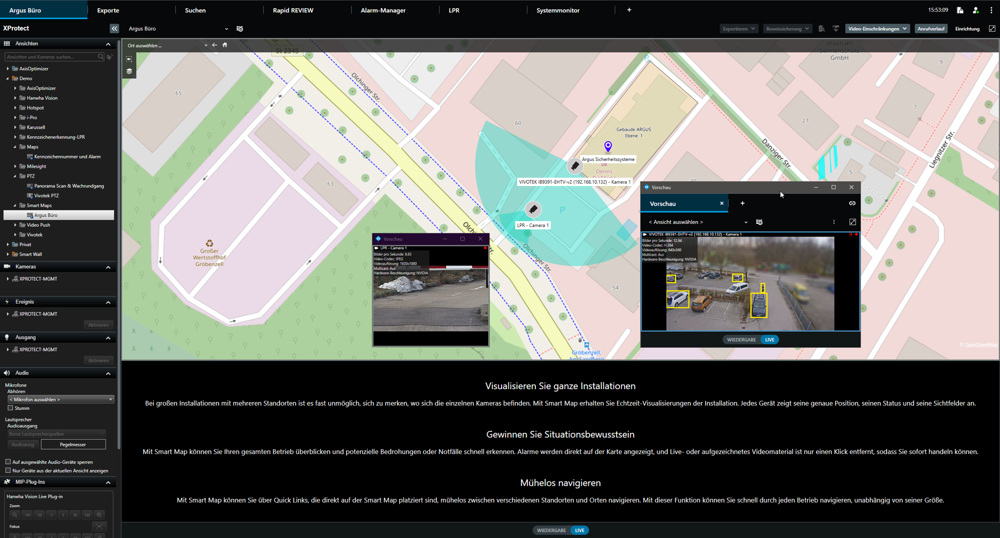
Maps and Smart Maps
The Smart Map is a map feature embedded in the XProtect® Smart Client. With its native support for GIS maps and CAD drawings, as well as support for online map services such as Google Maps and Bing Maps, it visualizes the elements of a surveillance system with geographic, accurate and real images.
Visualize entire installations
In large installations with multiple locations, it is almost impossible to remember where each camera is located. With Smart Map, you get real-time visualizations of the installation. Each device shows its exact position, status and fields of view.
Gain situational awareness
With Smart Map, you can get an overview of your entire operation and quickly identify potential threats or emergencies. Alerts are displayed directly on the map and live or recorded video footage is just a click away, so you can take immediate action.
Navigate effortlessly
With Smart Map, you can easily navigate between different locations and places via quick links placed directly on the Smart Map. With this feature, you can quickly navigate through any business, regardless of its size.
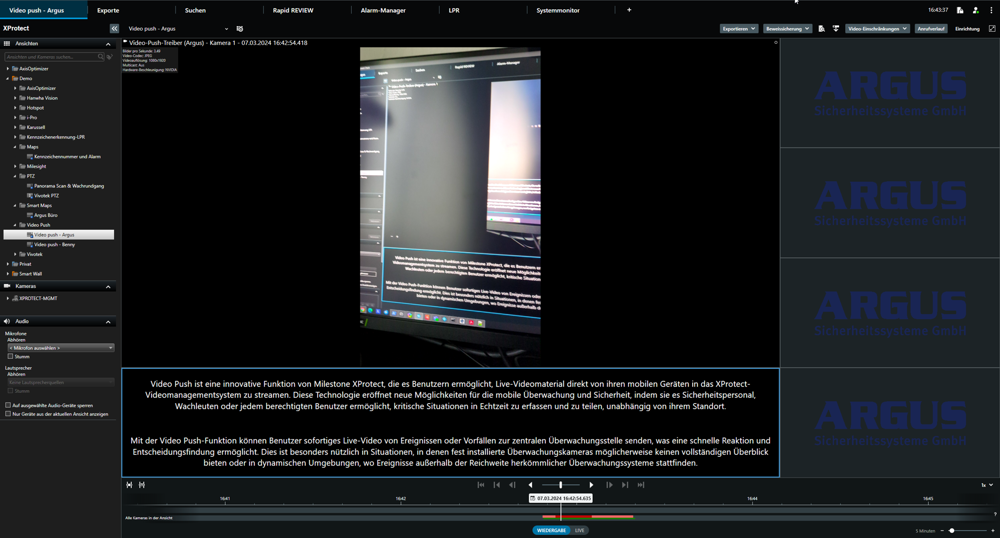
Video Push
Video Push is an innovative feature of Milestone XProtect that allows users to stream live video footage directly from their mobile devices into the XProtect video management system. This technology opens up new possibilities for mobile surveillance and security by enabling security personnel, guards or any authorized user to capture and share critical situations in real time, regardless of their location.
With the Video Push feature, users can instantly send live video of events or incidents to the central monitoring location, allowing for quick response and decision making. This is particularly useful in situations where fixed surveillance cameras may not provide a complete overview or in dynamic environments where events take place beyond the reach of traditional surveillance systems.The integration of Video Push into Milestone XProtect goes with Milestone's mobile application (XProtect Mobile), which offers a simple and intuitive user interface. This allows users to transfer high quality video footage with just a few clicks. Milestone XProtect also supports advanced security and authentication protocols to ensure the security and integrity of the transmitted video footage.
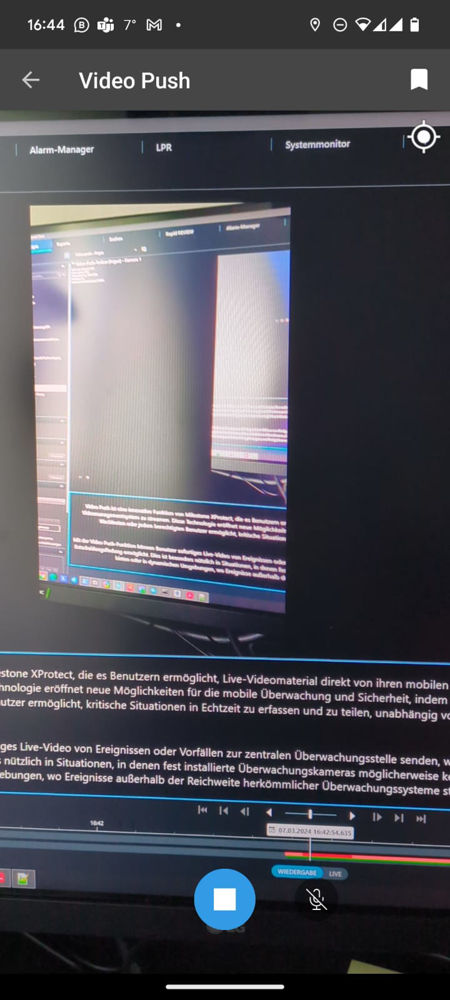
To start the video push from your cell phone, proceed as follows (Warning: the recording from your cell phone camera will only be deleted after one hour).
.
- Now install and open the Xprotect Mobile app on your cell phone.
- Click on the Add server button and then Add server manually. Enter Argus Demo Server as the server name
. Enter demomgmtsrv.argus.eu as the address. - Make sure that the https protocol is selected.
- Then select Continue login. Now enter the login data (as for the Smart Client login) and pay attention to capitalization.
- Then select Log in.
- In the "Views" tab, click on the camera icon (video push icon) in the bottom right-hand corner.
- Before you start the video push, open a view with the video push channel in the Smart Client
and click on the settings icon at the top right in the XProtect Mobile app . - Increase the video resolution to High, then activate the settings for Automatic
image quality and location data. Click on the left-pointing arrow at the top left . - Activate the microphone and switch to the selfie camera and then press Start to
start the video push. Speak to your phone and then stop the recording . - Select the playback mode in the Smart Client under the view and check whether the
video push has been recorded. Then close the Smart Client.
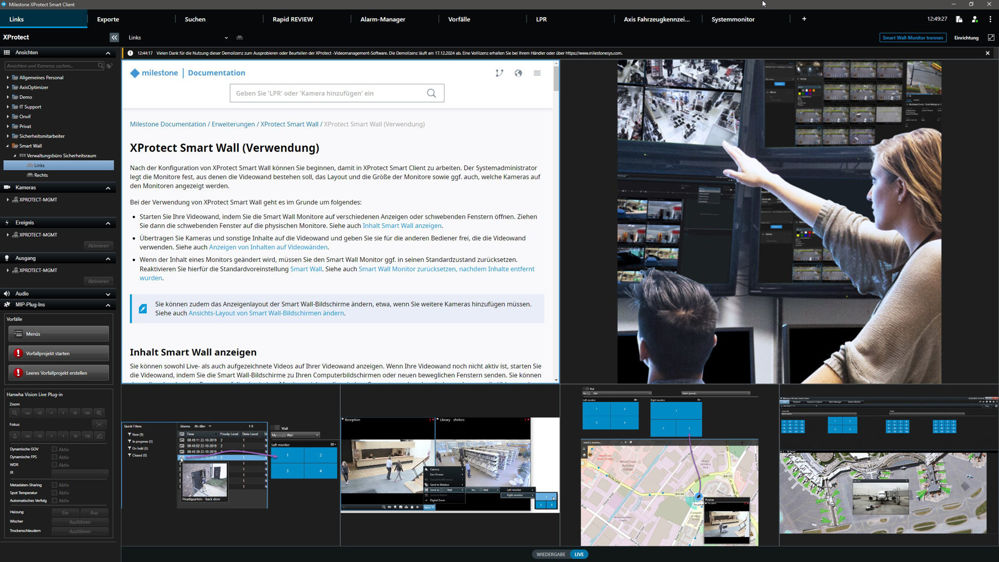
Smart Wall
XProtect Smart Wall is an advanced video wall solution that provides a complete situational overview of large surveillance centers. Fully integrated with the XProtect® Smart Client, XProtect Smart Wall displays the most relevant video data for your installation. Preset views allow users to focus on the essentials and respond quickly and effectively to multi-user activity.
The Smart Wall provides a collaborative layer through which to effectively share and coordinate control room responses and activities. It supports a wide range of information, including maps, video, alarms and notifications, to help operators focus on their core task.
The situational tools in the XProtect Smart Client are fully integrated into the Smart Wall, making it easier for users to instantly share content with other users on the video wall. The information can also appear automatically on the XProtect Smart Wall based on events and alarms triggered in the VMS system.
Depending on the hardware
Regardless of the manufacturer, the XProtect Smart Wall supports any combination of screens. It runs on standard servers and displays. This gives you the freedom to choose the hardware that best suits your needs and budget. The XProtect Smart Wall also uses hardware-assisted decoding, resulting in high-quality video performance and a significantly reduced CPU load. Its full integration in the XProtect Smart Client simplifies its deployment and reduces the need for extensive user training.
Adaptive streaming and hardware acceleration
Adaptive streaming improves the decoding capability and performance of the computer running XProtect Smart Client. This is useful when viewing multiple live video streams in the same view.
To take advantage of adaptive streaming, multiple streams with different resolutions must be defined for your cameras. This allows XProtect Smart Client to automatically select the resolution that comes closest to the one required by the view element. Now XProtect Smart Client no longer needs to display the default streams at an unnecessarily high resolution. This reduces the load on CPU and GPU decoding resources and the load on the network.
In this case, the function allows you to do the following:
Optimize video quality - selects the stream with the lowest available resolution that is equal to or higher than the requested resolution.
Optimize server performance - reduces the requested resolution and then selects the stream with the lowest available resolution that is equal to or higher than the reduced request.
Optimize resolution for low bandwidth - selects the stream with the lowest available resolution (recommended if you are using 3G or an unstable network).
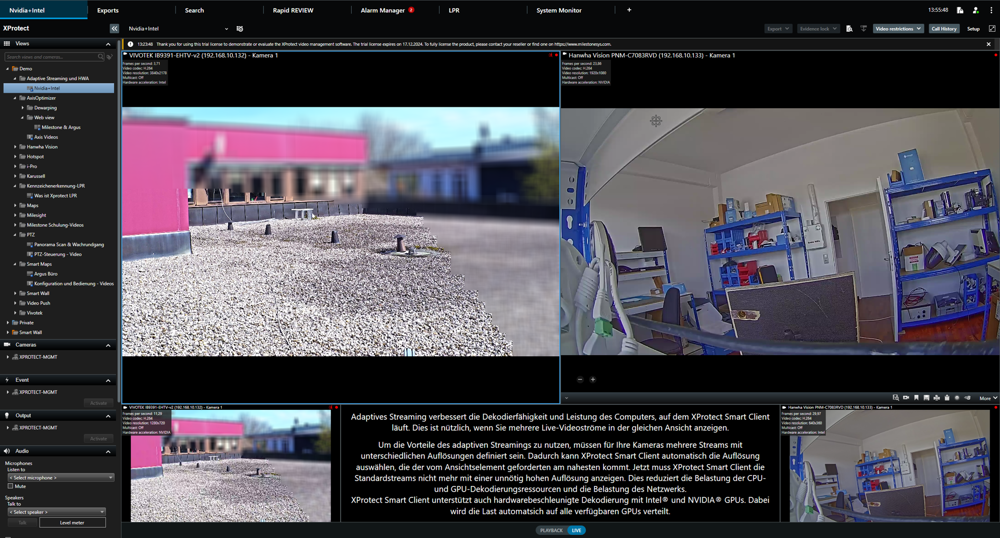
XProtect Smart Client supports hardware-accelerated decoding with Intel® (left, Vivotek camera) and NVIDIA® GPUs (right, Hanwha camera) simultaneously and automatically distributes the load across all available GPUs on the client machine.
Third-party plugins:
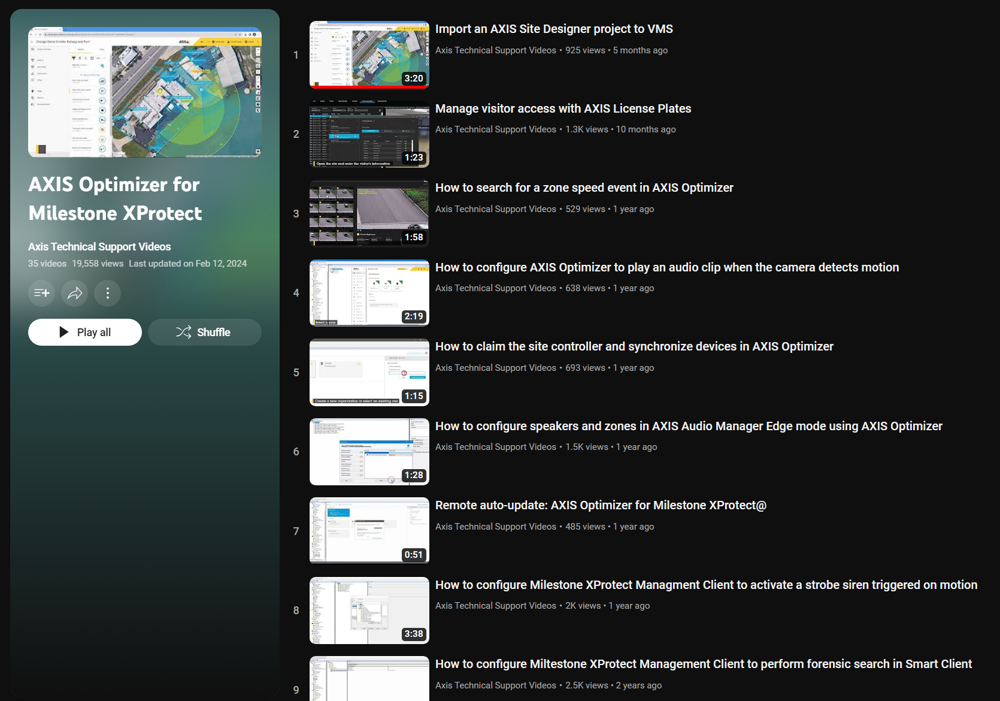
AXIS Optimizer
AXIS Optimizer is designed exclusively for XProtect and consists of a set of plugins and features to optimize the user experience of Axis cameras. It automates plugin management and ensures that users have direct access to the latest innovations from Axis. It is regularly updated and available free of charge. It offers maximum value to end users and system integrators by providing several valuable plugins for optimal installation, management and operation of Axis devices in XProtect.
Some functions of the Axis Optimizer (such as Dewarping and Web View) also work without Axis cameras. You can find useful videos from Axis Technical Support under the "Axis Videos" view.
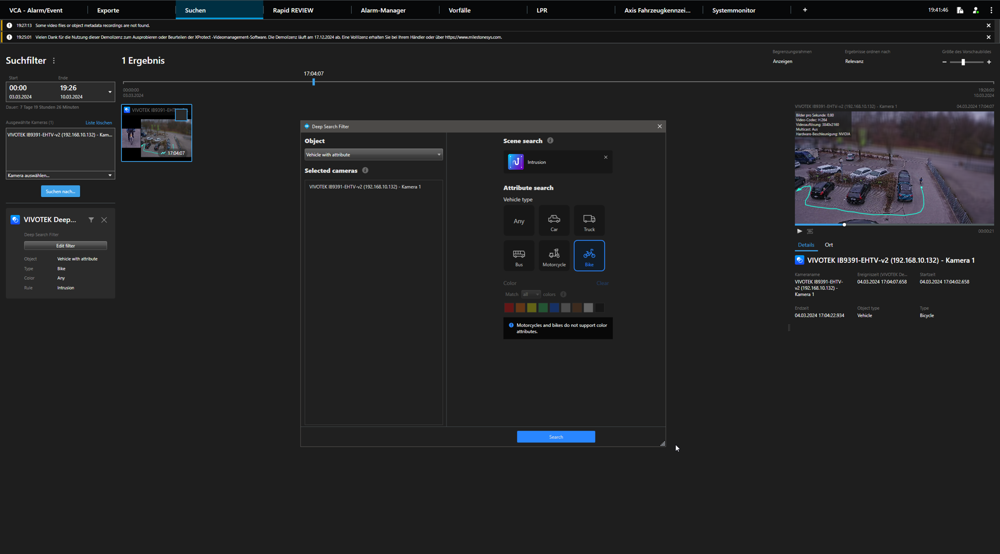
VIVOTEK Deep Search and VCA
A groundbreaking solution that uses artificial intelligence to speed up and simplify the search for video footage. This suite consists of three main functions:
Attribute Search: Deep Search enables an automated investigation where you can find evidence at a glance. No more tedious searching through video footage.
Scene search: Precise path extraction shows the track of a person or vehicle without you having to play the video. Each search result also includes a "best shot" image that shows the clear image of the person or vehicle of interest.
Re-Search: This function allows you to refine the search process and reduce duplicate results. You get clear indications of the history of a person or vehicle.
VIVOTEK Deep Search is easy to use, requires no complicated configuration and provides an efficient way to search video footage. The camera independently learns the scene and optimizes the analysis results for people and vehicles.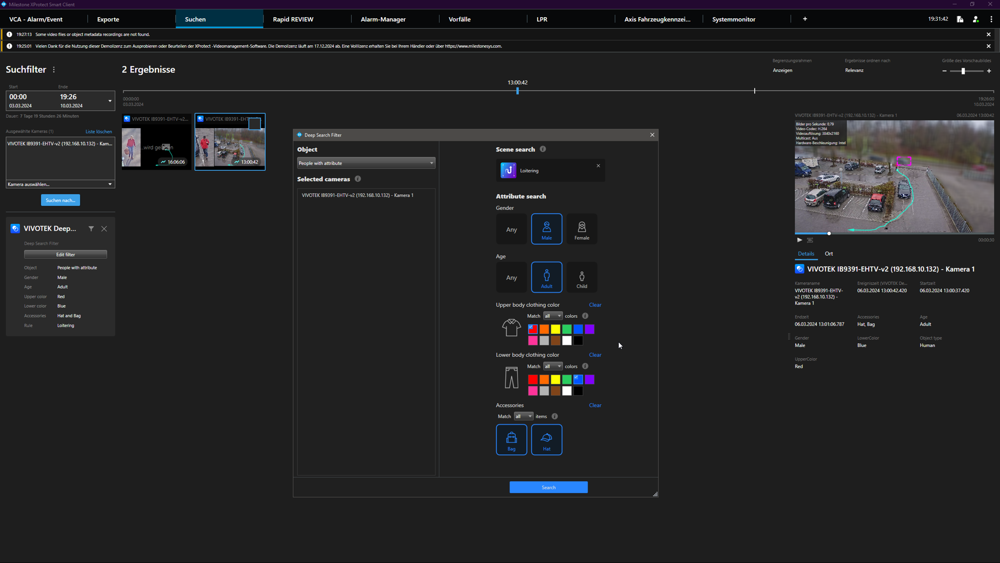
With Vivotek Deep Search, you can combine forensic search with scene search and attribute search to limit the search to relevant objects.
Hanwha Vision Plug-In for Milestone
The Hanwha Plugin for XProtect enables a better connection between the Hanwha devices and XProtect. In addition to searching for AI metadata, this plugin enables the control of camera and intercom functions in the Smart Client and Management Client.
Main features:
Supports the search for AI cameras based on object attributes (like the previous AI camera plugin)
Management of special camera functions (wipers, heating, dry spinning, autofocus)
Receive and answer calls from the Hanwha TID-600R intercom along with unlocking the door.
Access to the Hanwha camera website via the XProtect Management Client application (based on the standalone Wisenet Camera Configuration Plug)
Common detection of metadata between thermal and non-thermal channels.
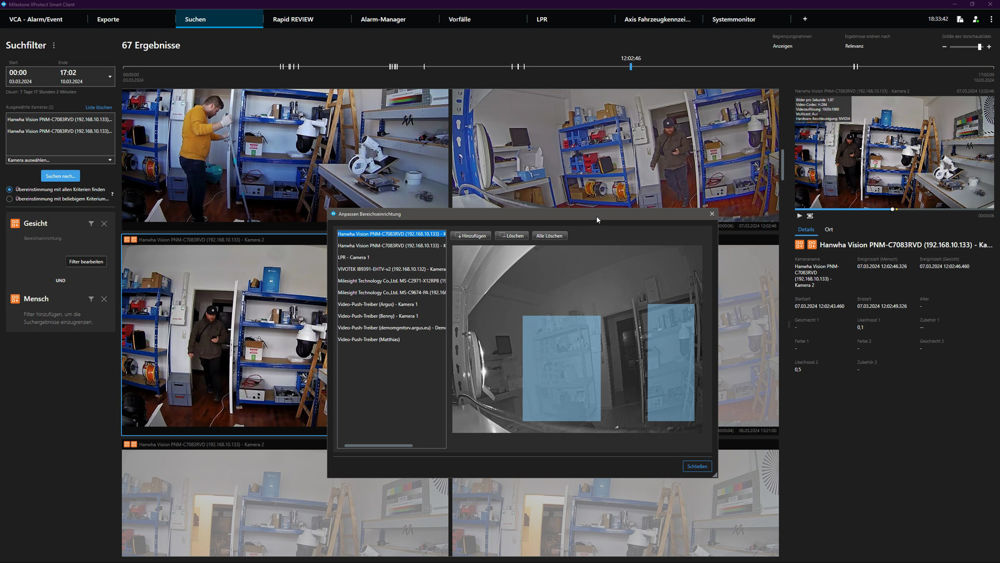
The Hanwha Vision plugin for Milestone can perform a forensic search in selected areas.
Milesight MIP Plug-In for Milestone
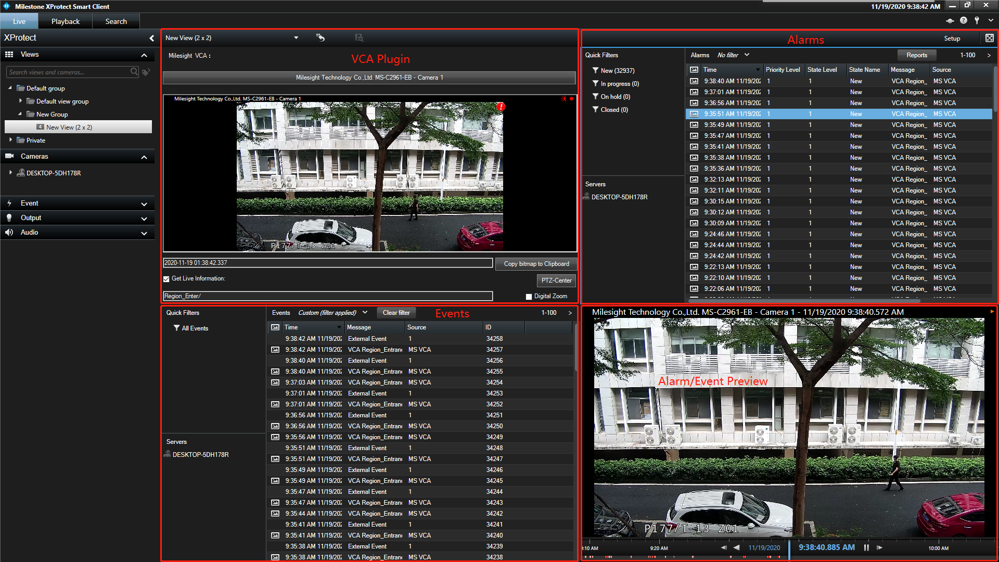
The plugin allows you to configure Milesight network cameras and Milesight VCA from the Management Client. In the Smart Client, you can use the plugin to receive the VCA alarms in real time, view the event and alarm details and search for the triggered VCA alarms and events.
Milesight Video Content Analytics
Milesight VCA provides advanced video analytics for Milesight network cameras. It improves the performance of network cameras through 10 detection modes, providing a comprehensive monitoring function and faster response of the entire VCA solution to various surveillance scenes. In addition, Milesight network cameras support independent function settings for a convenient user experience.